 |
| Install SNMP and Configuration on Windows Server 2019 |
Install SNMP and Configuration on Windows Server 2019 - Hi friends, this time I will share something that might enlighten you when you want to install SNMP agent on Windows Server 2019.
In the case I presented in this post, the firewall on Windows Server 2019 is disabled, so there is no need to configure UDP port settings for PRTG. My goal is to install this SNMP agent so that the system or server with Windows Server OS can be monitored with PRTG.
Okay, let's get started with the easy steps. Follow the instructions I'm about to give you below so that the SNMP service can run and be used on Windows 2019.
Install SNMP
Step 1 – Install SNMP On Windows Server 2019
Open the Server Manager - Click Manage - Choose Add Roles and Features
 |
| Installing SNMP on Windows Server 2019 |
Now, you will be presented with several wizards. You just need to click 'Next' until you reach the 'Features' wizard.
Before you begin : Next
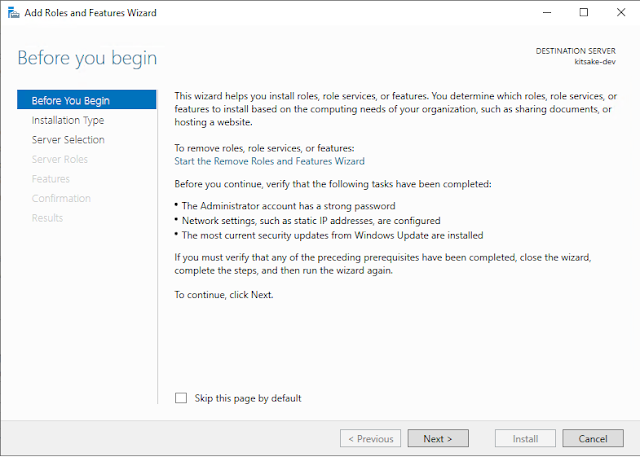 |
| Before you begin |
Select installation type : Next
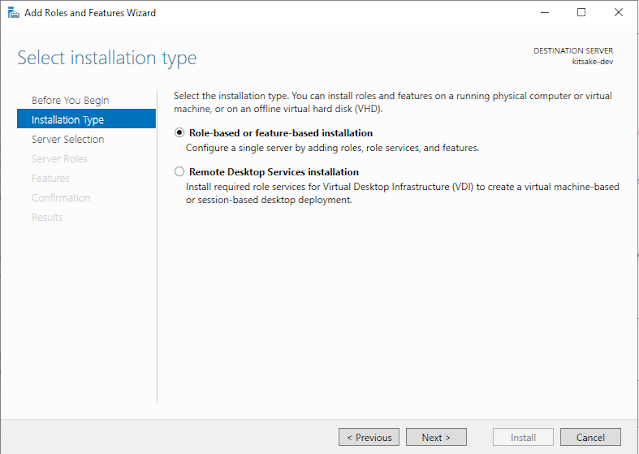 |
| Select installation type |
Select destination server : Next
 |
| Select destination server |
Select server roles : Next
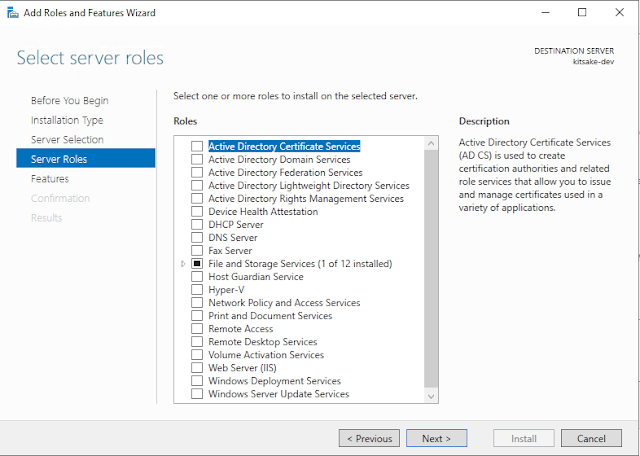 |
| Select server roles |
We have reached the 'Features' wizard because we are going to install SNMP, and SNMP is part of the features of Windows Server 2019.
Features : Checklist SNMP Service - Klik Add Features
 |
| Add Features |
Features : Next
 |
| Features |
Okay, now we have reached the final step of the installation. Just click and wait until it's finished.
Confirm installation selections : Install
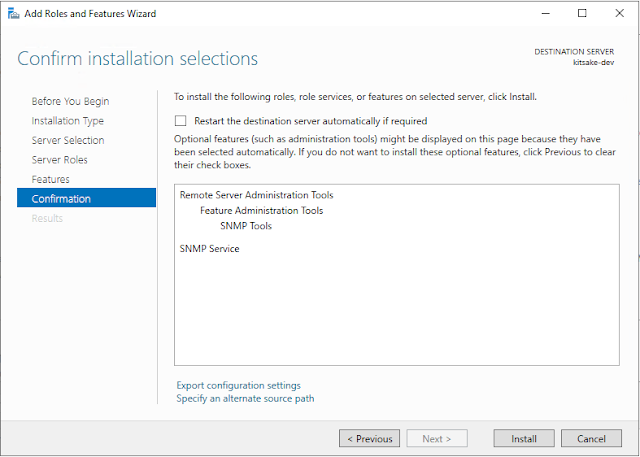 |
| Confirm installation selections |
Installation Progress : Close
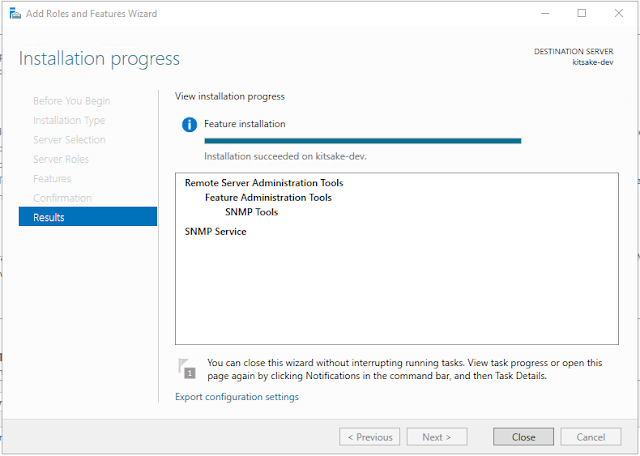 |
| Installation progress |
Step 2 – Configure SNMP On Windows Server 2019
The SNMP installation process has been successful. Now it's time to move on to the next step, which is configuring SNMP. You might wonder why it needs to be configured. Well, usually, PRTG network monitoring is on a different server but within the same network. By default, the SNMP agent can only be accessed by the localhost.
In this case, we want to configure the agent to be accessible by other IP addresses within the same network using the desired community string.
Run : windows + r - type services.msc - click ok
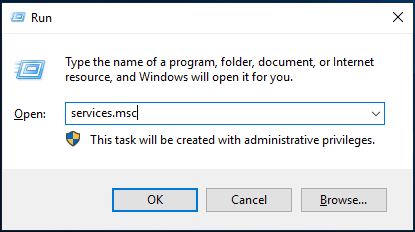 |
| services.msc |
Here is where we will configure it according to our desired settings, based on the case I explained earlier. Just follow the steps.
services : double click SNMP Service - choose Security tab - klik Add - type community name "kitsake" - Klik Add - Checlist Accept SNMP packets from any host - Apply - Ok
 |
| SNMP Service Properties (Local Computer) |
The configuration step is complete, and now you just need to restart the service to apply the configuration changes we made earlier.
services : right click SNMP Service - Click Restart
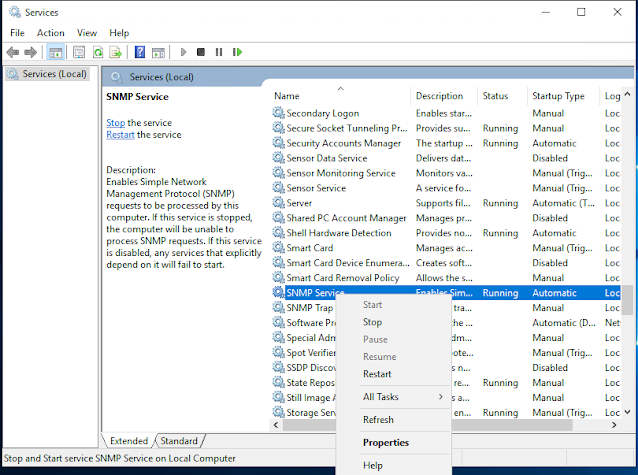 |
| Restart Service SNMP |
Add Host to PRTG
Step 1 – Add Device to PRTG Network Monitor
After SNMP has been successfully installed and configured on Windows Server 2019, it's time to add it to PRTG and monitor the utilities of that Windows Server 2019 using the SNMP sensor.
The steps to add the device are as follows:
Group on PRTG : right click on Group Add Device
 |
| Add Device |
Add Device : on Credentials for SNMP Devices type community name "kitsake" - Click Save
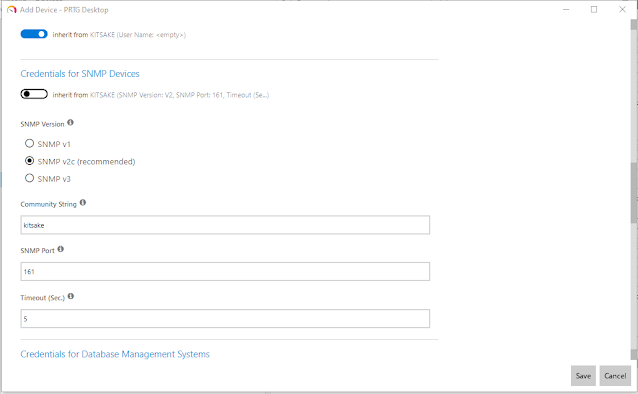 |
| Setting Credentials for SNMP Devices |
Step 2 – Add Sensor on Device to PRTG Network Monitor
Next is to add several sensors that will be displayed.
Device : Right Click Add Sensor
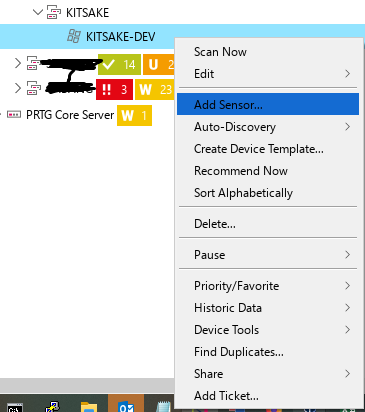 |
| Add Sensor |
Search for sensors based on the keyword 'SNMP'.
Search Sensor : type snmp
 |
| Choose sensor what you want added to PRTG Network Monitoring with snmp sensor |
In my example, I added a disk for monitoring, and you can select which partition you want to monitor.
Select Disk : Checklist on Disk C - Click Save
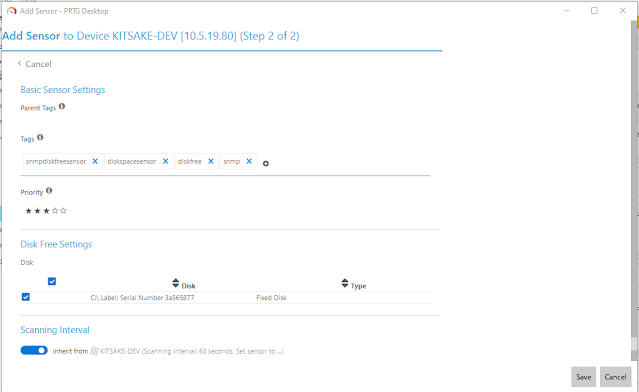 |
| Sample sensor disk with agent snmp |
And here are the results of several sensors that use SNMP to monitor the utilities on Windows Server 2019.
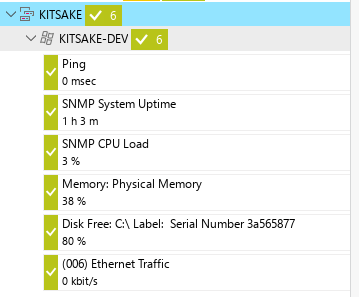 |
| Result on PRTG Network Monitoring for Device Windows Server 2019 |
Maybe that's all I can share with you guys, hopefully this article will be useful.
Thank You


Post a Comment for "Install SNMP and Configuration on Windows Server 2019"
Post a Comment