How to Extend Hard Disk on CentOS 7 type Partition 83 Linux
 |
| How to Extend Hard Disk on CentOS 7 type Partition 83 Linux |
How to Extend Hard Disk on CentOS 7 type Partition 83 Linux - Do you need more storage space on your CentOS 7 Partition 83 Linux? Don't worry; we've got you covered! In this comprehensive guide, we'll walk you through the process of extending your hard disk on CentOS 7, allowing you to free up space and ensure your system runs smoothly.
Whether you're running out of room for important files or need to accommodate growing data demands, learning how to extend your hard disk on CentOS 7 is essential for maintaining an efficient and organized system. So, let's dive in and explore the steps needed to expand your storage capacity effortlessly.
 |
| How to Extend Hard Disk on CentOS 7 type Partition 83 Linux |
Preparation
Step 1: Check Your Current Disk Space
Before diving into the process of extending the hard disk, it's essential to understand your system's current disk space usage. To do this, open the terminal and enter the following command:
# df -h
This command will display a list of mounted filesystems along with their disk usage details. Identify the partition you wish to extend (Partition 83) and take note of the available space.
# lsblk
 |
| Check Your Current Disk Space |
Step 2: Take a Backup
Manipulating disk partitions can be risky, so it's crucial to create a backup of your important data before proceeding. If anything goes wrong during the process, you'll have a safeguard to fall back on.
There are many ways to back up your data, but in this case, I am backing up the entire OS using Synology NAS because I will be making changes on the OS side.
Step 3: Download Gparted
In this tutorial, I will be using a widely used tool called Gparted. You can download it here first.
After downloading, you can directly upload it to ESXi, where the VM that needs the additional hard disk is located. We will perform the addition using a live CD and require booting with the Gparted ISO.
Step-by-Step Guide
Step 1: Adding disk space in VMware
Next, we'll take action in VMware by increasing the size of the hard disk 1. Enter the required size; for example, I'll raise it from 10 GB to 20 GB.
In the VMware vSphere Client : select your ESXi VM CentOS 7 and go to "Edit Settings." Locate the virtual disk you want to extend and increase its size.
Step 2: Mount gparted.iso in VMware
Now, the next step is to mount the downloaded Gparted Live ISO into the CentOS 7 OS, where we will add the additional hard disk. Follow these steps:
In the VMware vSphere Client : click CD/DVD Media - choose Datastore ISO File - choose gparted-live-1.5.0-1-amd64.iso - checklist Connected
 |
| Adding disk space and mount gparted-live-1.5.0-1-amd64.iso |
Step 3: Setup first boot in VMware
The final step we need to perform in your ESXi or VCenter is to change the first boot settings in your VM.
In the VMware vSphere Client : click Tab VM Options - Expand Boot Options - on Force BIOS setup checklist During the next boot, force entry into the BIOS setup screen - click OK
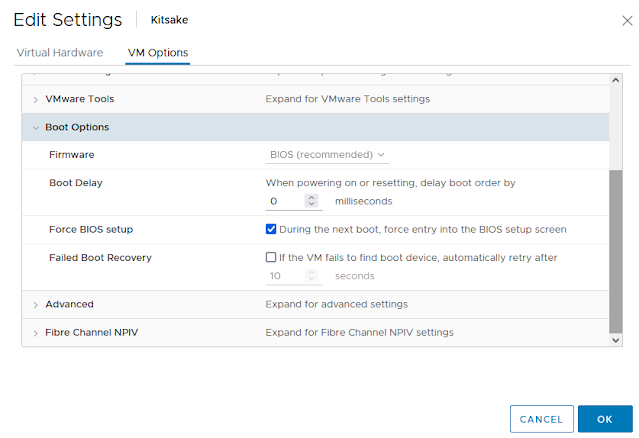 |
| Setup first boot in VMware |
Step 4: Restart the system and perform the configuration using the Gparted Live ISO.
Open the terminal and hit this command to restart the system.
# reboot
And reopen your vCenter and Launch Remote Console setup boot to CD-ROM Drive.
choose tab Boot - Move the CD-ROM Drive to the top - Save and Exit press F10 - Setup Confirmation Choose Yes
 |
| Restart the system and perform the configuration using the Gparted Live ISO |
Step 5: Launch GParted Live
Gnome Partition Editor
Choose Gparted Live (Default setting) - Press Enter
 |
| Gnome Partition Editor |
Configuring console-data
Choose Select Don't touch keymap - Press Enter
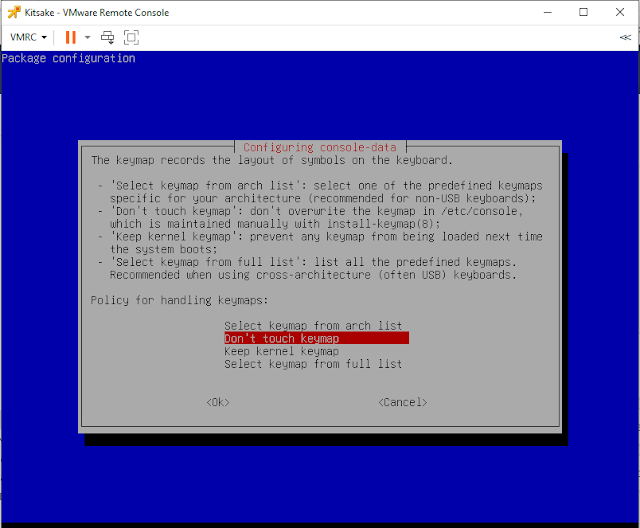 |
| Configuration console-data |
Looking for a keymap to install
Press Enter
 |
| Looking for a keymap to install |
Which language do you prefer?
Press Enter
Which mode do you prefer?
Press Enter
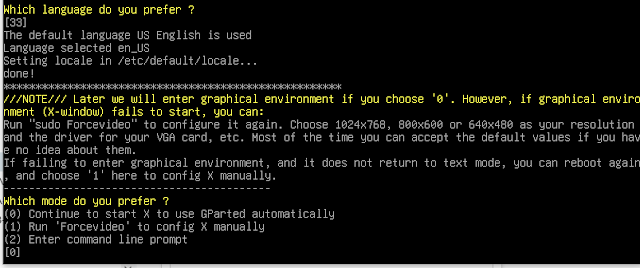 |
| Which language do you prefer? |
Step 6: Configure in GParted Live
Wait until the process is complete, and a new window appears. Then, select the drive we added earlier, which has a capacity of 20 GB or /dev/sdb. In there, you will find 2 disks that have been allocated as /dev/sdb1 or mounted in my OS as /kitsake partition, and there is 10 GB of unallocated space.
Click on disk and choose /dev/sdb
 |
| select the drive |
Now, we will add this unallocated space to /kitsake. Right-click on /dev/sdb1 in the displayed list.
select /dev/sdb1 - and thent Right Click - Choose Resize/Move
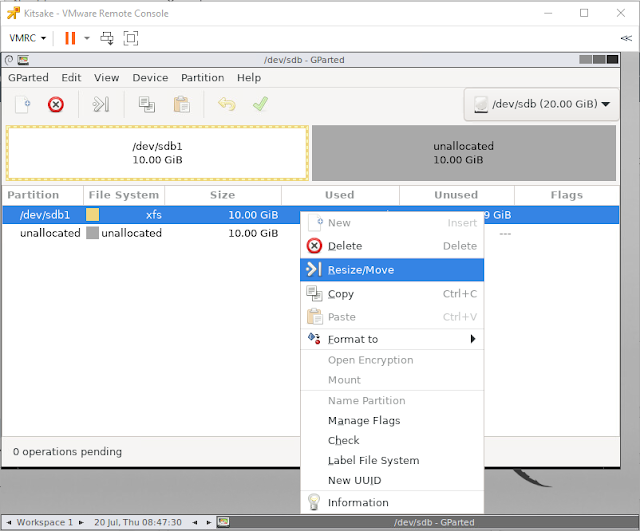 |
| Right-click on /dev/sdb1 in the displayed list, then choose Resize/Move |
After that, move the slider to the right to allocate all the available sizes to /dev/sdb1.
move the slider to the right - then click Resize/Move
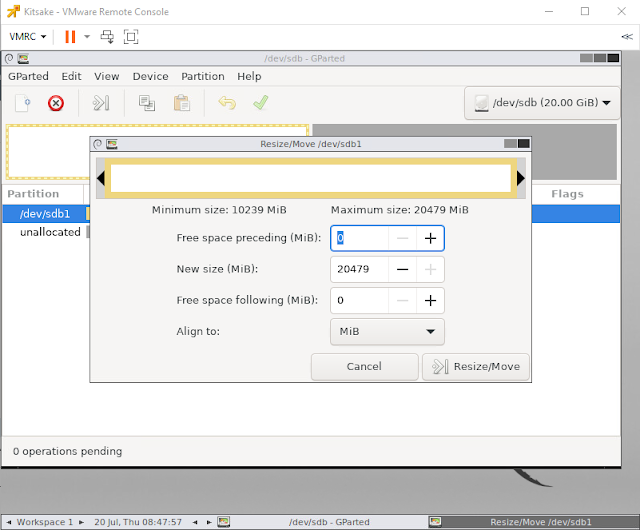 |
| Then, click Resize/Move. |
On the green checkbox logo, click directly to apply the changes we made above.
Click Green checkbox logo
 |
| click directly to apply the changes we made above |
A pop-up will appear, click Apply.
Click Apply
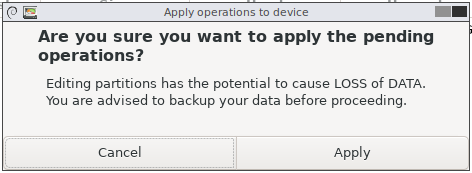 |
| A pop-up will appear, click Apply. |
Once the process is complete, simply close the window.
Click Close
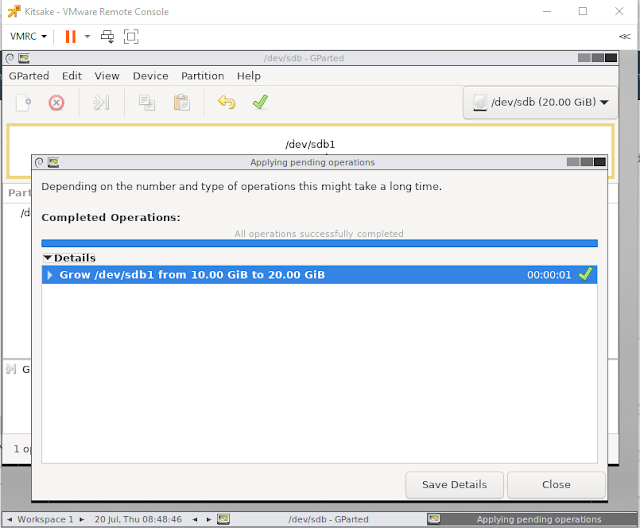 |
| Close |
Then, click on the Gparted tab, select Quit, and on the next window.
choose the exit logo - and then select reboot - click OK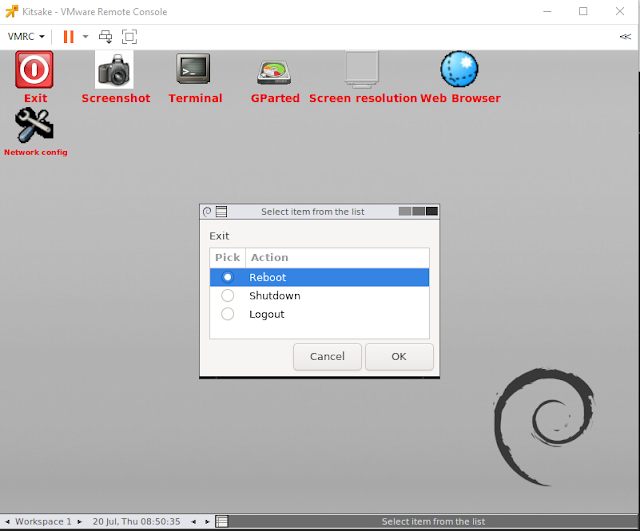 |
| Exit from gparted live |
A notification will appear: "Please remove the live medium, close the tray (if any), and press ENTER to continue."
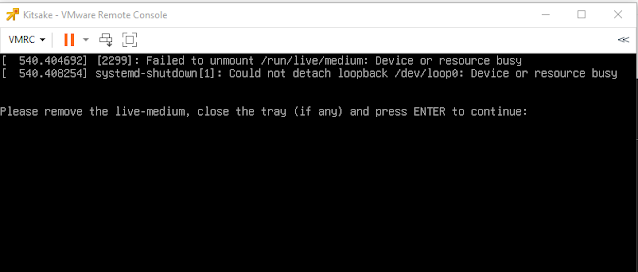 |
| Please remove the live medium, close the tray (if any), and press ENTER to continue |
Now, go to vCenter
Right click on the CentOS 7 VM, select the Virtual Hardware tab - and in the CD/DVD drive option, change it to Client Device - Click OK.
 |
| Unmount CD-ROM |
Next, open the console again and press enter. Then, wait for the booting process to finish until the OS starts up.
Check Capacity After Added Extend Hard Disk
And that's it! You can now check the modified disk by following the steps below:
# df -h
# lsblk
 |
| Check Your Disk Space After Added Size |
That's how to extend a Hard Disk on CentOS 7 type Partition 83 Linux. Don't forget to try it in a development environment first before implementing it in the production environment. And always make a backup before making any changes, just to be safe.
Closing statement
In conclusion, extending the hard disk on CentOS 7 Partition 83 Linux is a straightforward process that can greatly enhance your system's performance and storage capabilities.
By following the steps outlined in this guide, you can efficiently manage your storage space, ensuring that your CentOS 7 system operates smoothly and meets your evolving needs.
Whether you're a seasoned Linux user or a beginner, mastering disk management is an invaluable skill that can optimize your system's efficiency and productivity. So, take charge of your storage needs today and enjoy a seamless computing experience on CentOS 7!
Maybe that's all I can share with you guys, hopefully, this article will be useful.
Thank You.


Post a Comment for "How to Extend Hard Disk on CentOS 7 type Partition 83 Linux"
Post a Comment